How do I set my Arlo Solar Panel (VMA4600) to power my Arlo Pro or Arlo Go camera?
To set up your Arlo Solar Panel:
- Choose a good outdoor location for your Arlo Solar Panel, within 4.5 feet (1.3 m) of your Arlo camera.
The solar panel can absorb the most solar energy when it is in full sunlight for as much of the day as possible. You can mount the solar panel on your wall, fence, roof, gutter, or eaves. Make sure that you mount your solar panel facing true south (in the northern hemisphere) or true north (in the southern hemisphere). - Secure the mount with the screws provided in the package.
- Attach your solar panel to the mount.
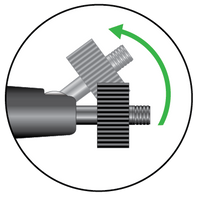
- Adjust the angle of the solar panel on the mount to the appropriate angle for your latitude.
For help finding the right orientation and tilt angle, download the free SimplySolar app for iOS or Android.
- Make sure that your Arlo Pro Wire-Free or Arlo Go camera battery is fully charged.
Your Arlo Solar Panel is designed to keep your camera battery charged, not to charge the battery from low to full. - Connect the cable to your Arlo camera.
Warning: Do not unplug the cable from your Arlo Solar Panel. Damage to the cable or to the solar panel could result.
Note: The charging icon will not appear in the Arlo app until the solar panel has been in the sun for a while. If you want to confirm that your camera is charging, you can wait for the charging icon to appear, or you can check the camera’s battery percentage in the Arlo app from day to day.
For more information about the Arlo Solar Panel, see the following knowledge base articles:


